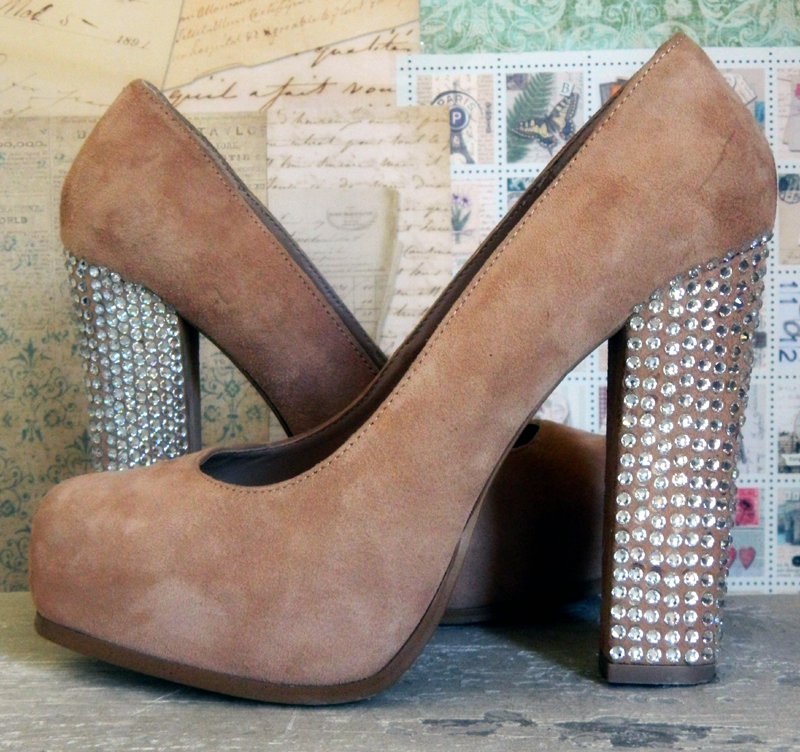
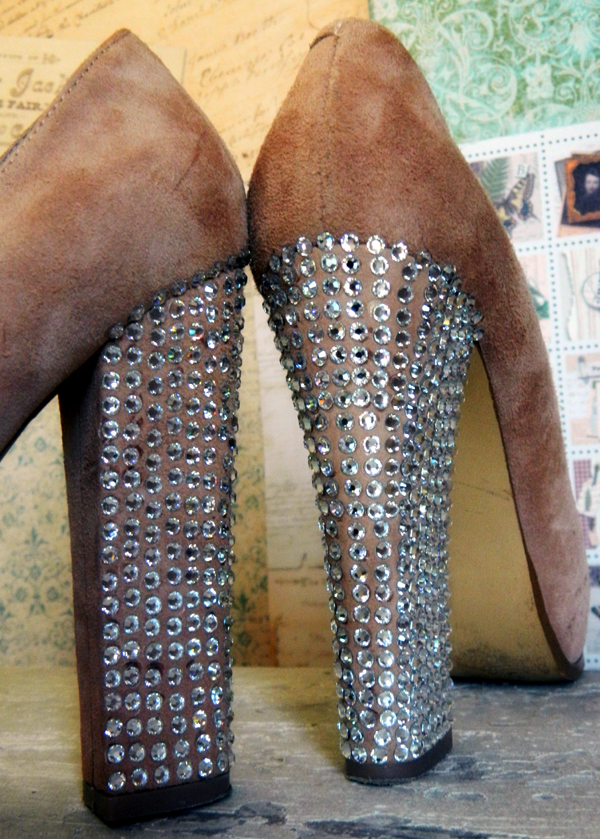
How to Bling Out Your Heels With Swarovski (Bejeweler Instructions)
by adminHello All Sparkler Lovers! Welcome to our first installment of Sparklers DIY.
This is a very popular DIY that we get asked about all the time. At shows we put a few blinged out heels on our table, and let me tell you , it is like moths to a flame. Ladies just can’t help themselves! They are totally gorgeous! You can see my original post about this fabulous DIY by clicking HERE
This DIY is bejeweler heavy, so get out your magic wand and power it up! Enjoy!
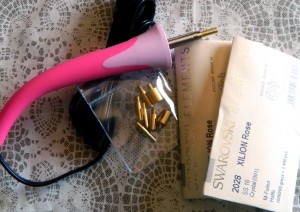
What you need: A Bejeweler with interchangeable tips. You can pick one up HERE
Some Hot Fix Crystals, I recommend 16ss Clear Swarovski Crystal. Swarovski is fabulous. You can pick some up HERE
I grabbed a package of 10 gross or 1440 pieces. You do use a lot of crystal on heels. Size 16ss or 4mm is the best size to start with. Not to big and not to small.
Then you need a pair of suede or fabric heels. It needs to be a porous material so the glue has something to hold on to. Slick leather is a no go.
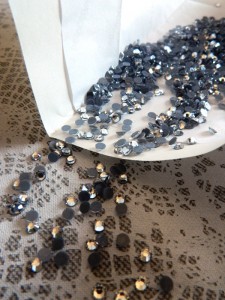
Oh Swarovski… you are so pretty! See the gray back? That is the hot fix glue, which makes it work with the Bejeweler Heat Setter Tool. Sooooo much easier then applying glue to each crystal & much less mess.
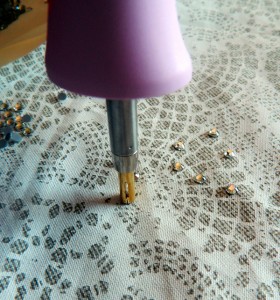
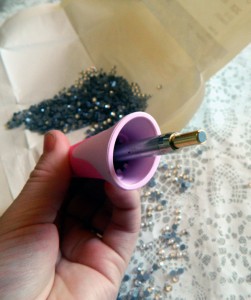
Lay out all of your crystals sparkly side up. Work on a hard flat surface, a wood cutting board works great. Make sure the right tip is screwed into the Bejeweler, it is inscribed on the side of each tip. Plug your Bejeweler in and give it a few minutes to get nice and hot.
To pick up the crystal, very gently place the Bejeweler tip directly on top of the crystal. Do not push down hard. Hold it there for a few seconds, the heat causes the crystal to expand slightly, and the tip will hold the stone.
Pick up the crystal and look at it. This is key. You are watching the back side, the glue, melt. It should bubble slightly and glisten. For a size 16ss or 4mm crystal it takes about 5-8 seconds for it to melt completely.
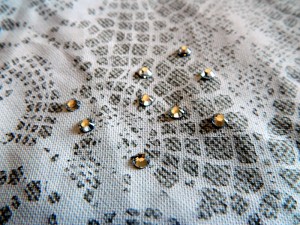
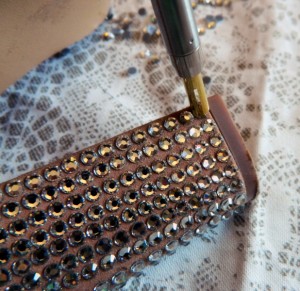
Gently touch the tip to where you want the crystal. The hot glue will pull the crystal out of the Bejeweler tip and set itself on to the fabric. I will give it a little extra by pushing the crystal on to the fabric to make sure it has a very secure hold. Be very careful! It is hot! Band-aide maybe?
Tip: If the crystal gets stuck in the tip, have a push pin in hand. Slide it into the slot on the tip and gently pull the crystal out. See the slots on the tip in the picture above? Very convenient.
Wha-La!! That is how you use the Bejeweler. Just repeat, repeat and repeat until you have covered what you want or you run out of crystals 🙂 Hope you get addicted to blinging, just like I have! Soon you will start thinking everything you own will look so much better with a little crystal here and there.
Thank you for stopping by and we hope you have a Sparkly Day!
xoxo-Honor
Learn how to apply Swarovski hot fix crystals with us
by adminWe are currently offering classes in how to apply Swarovski hot fix crystals and how to apply iron on Swarovski crystal designs at the shop. If you are in town, or going to be soon. Please call 888-999-0408 to sign up for the next class. Class size is limited and when we fill a date then we’re off and sparkling!
We travel across country to bring Swarovski hot fix crystals and iron on designs to a location near you. So please check out the calendar for the next event where we can teach you how to apply Swarovski hot fix crystals.
Mothers Day Embellished Scarf
by admin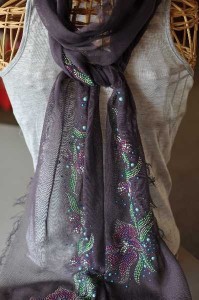
Mothers Day Embellished Scarf
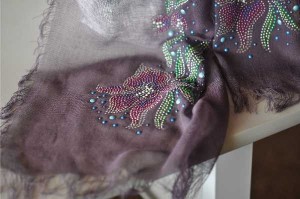
Mothers Day Scarf Detail
A scarf is the go-to item in today’s fashion world. They are the best and most versatile accessory to add flourish to any outfit. Now you can add embellishments through hot-fix crystals and metals to create an even more eye-catching accessory. Crystals can match or contrast the underlying fabric. The hot-fix crystals and metals can pull together any number of outfits with your favorite colors.
What you’ll need to make a scarf like the example shown:
>2 and 2/3 yards of cotton gauze (you’ll need to decide the width of your scarf, this example started with a 12 inch wide swatch, and fringed a little over one inch on all sides.)
>2 non-stick pressing cloths
>A hard surface, (I like to use a bread board, its nice and flat and hard, or you can use a piece of hard card board, although not corrugated cardboard.)
>A household iron, at wool setting.
>An iron-on motif made with hot-fix crystals and metals.
Directions
- Lay the first non-stick pressing cloth on the hard surface.
- Lay one end of the fringed fabric on top of the non-stick pressing cloth, this is necessary, because you will be melting glue onto and through the fabric.
- Peel off the backing of the iron-on motif and place on the fabric. You can cut the motifs apart and play with the arrangement of the elements on your scarf.
- Cover the iron-on motif plastic with the second non-stick pressing cloth, as this will keep the hot iron from scorching the scarf.
- Adjust the household iron to the wool setting, this is the third highest setting on most irons.
- Place the hot iron on top of the second pressing cloth on top of the design, and leave in place for 45 seconds.
- If the design is larger than the sole plate of the iron, lift and replace iron to melt the glue on the next section of the iron-on motif, repeat step 6 until the whole motif has its glue melted.
- Let the scarf cool in place on top of the first non-stick pressing cloth. The melted glue will harden as it cools, and will release from the non-stick surface when cold and hard. (Don’t get impatient at this point, let everything cool down, otherwise you’ll get strings of sticky glue coming up with the scarf and getting on the back of the thin fabric!)
- Lift the cooled scarf off the non-stick the first press cloth with the motif plastic still in place. The plastic will help to stabilize the fragile fabric as the hard glue releases from the non-stick cloth.
- Now everything is cool, use your hot iron to sweep over the motif to warm the plastic a little. This will ease the removal of the plastic from the fragile gauze fabric.
- Gently pull the warmed plastic, slowly, off the scarf and the hot-fix crystals and metals will remain in place. If a piece was missed it will come up with the plastic.
- Don’t panic, simply put the plastic back down and melt the glue on the missed piece and let cool. Do this by using the tip of the iron on the single piece(s). Let cool and continue to remove the plastic.
Put On Your Fancy Dancing Shoes!
by adminSparklers Workshop: Crafts for Those Who Love to Sparkle
Studded Flats
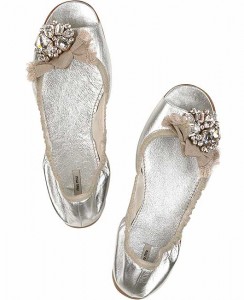
embellished flats
What You Will Need:
Canvas, velvet, unsealed suede or fabric ballet flats. No leather or plastic material. I have gone to GAP, Target and Forever 21 for some great finds! Package of hot-fix metals and/or hot-fix crystals, an assortment is best. Don’t forget your Bejeweler!
1) I like to begin with a brainstorm. When you apply the metals and/or crystals they are permanent so you want to get it right! You want to stay to two areas of the shoe only, the top of the toe and the back of the heel. If you scatter the crystal or metals along the inside part of your shoes, it will be in the direct path of wear your feet tend to scuff together. I like to place a few very large pieces of crystal of metal on the toe as an attention grabber. When these peek out from under your jeans you will be so tickled.
2) After I have a good idea of how I want the finished product to be I begin! I start with affixing the large pieces first and then work my way down in size to fill in the gaps. See Bejeweler tips & instructions below.
3) You don’t have to stick to flats, you can also create some seriously hot pumps with your Bejeweler and a few hot-fix crystals or metal studs
4) This is a seriously easy craft and the results are absolutely fabulous. Prepare yourself for plenty of complements!
Inspirations and Images
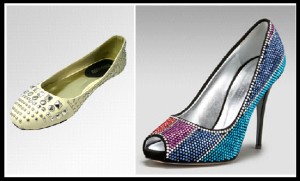
embellished pumps
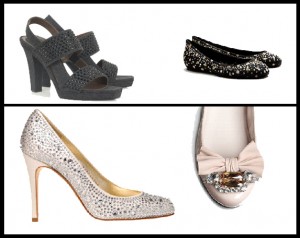
pumps, sandles and flats
Lots and lots of patience is needed for the overall crystal application, but you still get similar impact with strategic placement of only a few crystals and/or metals
Bejeweler Tips & Instructions
- Before you plug in your Bejeweler, choose the correct size tip to match the rhinestone you are using. Tips are etched on the side with the size number. If in doubt, place the tip over the rhinestone. It should pick up the rhinestone.
- Gently screw the tip into the end of the Bejeweler.
- Prepare your work surfaces and, if applying to fabric, use a firm, flat surface. For sheer fabrics, place a PTFE sheet under the fabric or between layers or the rhinestone may bond the surfaces together.
- Allow the Bejeweler to heat for 3 – 5 minutes.
- Place the rhinestones (face up) on a flat, hard surface. Gently place the tip over the rhinestone – do not push down. The tip will pick up the rhinestone for you.
- Allow the heat to melt the glue on the back of the rhinestone – the glue will begin to look wet. Small stones take very little time – larger stones will require more time.
- Place the rhinestone onto the surface of your item and immediately lift the tip up. The tip of the tool should not be held onto the surface of the item. Turn the tip of the tool to the side and gently press the crystal down to make certain it is tightly adhered to the surface.
How to apply iron-on designs
by adminIron-On Instructions
Fabrics That May Or May Not Be Used!
YES: cottons, cotton blends, wool, silk, velveteen, velour, denim (the softer the better), t-shirts and sweatshirts are probably your easiest fabrics; lycra, slinky (a little trickier, but possible), cotton sweaters are easiest. Always test fabrics if you’re not sure, read the garment hang tag.
NO: nylon jackets, velvet, acrylic, leather, vinyl, trigger (fabrics with a finish). Don’t forget to read the hang tags.
Sue’s Sparklers takes no responsibility for the application or your iron.
Easy to Apply Directions
- Always iron on a hard, flat surface (no padded ironing board). Lay out your shirt.
- Peel off the white backing of the design.
- Place the sticky side down onto fabric. If not in the desired place, you may pick up the design and place it again and again. Cut it apart, change it, nothing is permanent until you press it on.
- Put the pressing cloth over the design. (I prefer the non-stick pressing cloth, because I have scorched all the cotton cloths. You may use a pressing cloth as lightweight as a man’s handkerchief.)
- Set your iron on a wool setting – NO STEAM. Temperature may be adjusted as needed. All irons are different.
- Place your iron on the pressing cloth on top of the design. Your iron will sit there a minimum of 45 – 60 seconds. Do not move your iron. Let it sit in place. This makes you nervous. BUT – the length of time and your temperature is what is melting the glue. Make sure your iron sits there long enough. If it sits there long enough and the glue isn’t getting melted, then the temperature of your iron will need to be adjusted.
** Click Here to see pictures of a design applied with too much heat.
- Once you have let the iron sit in one place for 60 seconds, take the front half of your iron and press down in small sections at a time. This will help with different size pieces and different heights of pieces in your designs.
- If your design is larger than your iron, move the pressing cloth with the iron, and do the next section. Don’t worry about overlap. It is also a good idea to turn your shirt inside out and repeat the instructions and press from the backside.
- Now, let the plastic cool. There should be a slight ripple or bubbling in the plastic. If the plastic is perfectly flat, your iron was probably not warm enough. If it looks like the edges are shrinking, your iron might be a little too warm. If it is really shrunken and you have melted the plastic onto the garment – your iron is way too warm. Check your temperature.When the plastic is cool, the glue has had time to cool off. Approximately 5 minutes. Your sticky plastic will remove easier. If you run the iron over the top of the design. This will warm up the plastic and make it easier to peel off. If there are pieces sticking to the clear plastic, you have missed a section, OR if you have let the iron sit there long enough, your iron is not warm enough. Turn up the temperature and repeat process until you get the glue melted.
- If there are larger crystals in the designs, size 16ss or 20ss, keep in mind that with the extra depth, you’ll need to use more time to melt the glue. Approximately 75 – 90 seconds. If there are small flat pieces next to the larger pieces, make sure they get ironed on securely.
Your project is now complete! Now make sure the pieces are securely bonded. Rub your palms across the design, up and down, back and forth. Now, use your thumbnail and aggressively scrape at the pieces. If anything feels loose, you’ll need to re-iron. Once the glue is permanently melted, your garment can be machine washed, machine dried or dry cleaned. TEST IT! You have to melt the glue to make it permanent. Everyone’s iron is different. Turn inside out to launder. Designs that contain FLAT colored metals should be hung to dry. (such as red, blue, etc.)
Heat Press: Iron for 10-15 seconds at 350 degrees Fahrenheit using light to light medium pressure. If you are using cabochons, make sure to turn the shirt inside out and press again from the wrong side. Let it cool, remove plastic and press again with more pressure. You can also turn it inside out and press from the wrong side.
No responsibility is taken for the reliability of your iron. Irons may heat up after being used for awhile.
We also have cutout designs: a rainbow, large and small cut-out star, small stars, small butterflies, large butterfly, small Christmas bulbs, bear paw quilt pattern, ex-large wreath, lightning bolt, poinsettia. These are super easy to use and very fast. They are already cut out for you! They range in price from $3.00 to $16.00.
As much as we hate to say this, we think the sequins should be air-dried. They will last longer if they are not put into the dryer.
Iron-on pearls come in white, cream & blue in sizes 10ss, 16ss, and white & cream in size 34ss. They are the same prices as the colored crystals in similar sizes.
Instructions for changing metals to crystals on Iron on design
Size 6ss and 10ss crystals will iron on easily with the metals, so feel free to change any metal pieces in a design for the crystals. But with larger crystals (I 6ss and up), you should iron them on in a second step. It’s easier to iron on flat metal pieces, (better iron contact), then to try to work around large crystals. If a design comes with 16ss crystals or larger, peel off the crystals, iron on the metals, peel off the plastic – make sure that the metals are adhering properly, and then iron-on the crystals.
A popular example is the peacock. Peel off the backing, and remove the 4mm metals inside the moon shapes, in his tail, and the 3 3mm metals at the top of his head. Save these metal pieces for another project. Iron on the peacock. Remove the plastic, iron from the backside, and make sure the pieces are securely bonded. Test with your fingernails for security. Now place the 16ss crystals inside the moon shapes, cover with a pressing cloth, and iron for a minimum of 45-60 seconds. Make sure the glue is melted. They won’t be secure if it isn’t. Place the 3 10ss crystals at the top of his head. Iron them on. You’re done! Now thank everyone for all the compliments you will be receiving.
How To Make Your Own Design
by admin| 1. To make your own design you’ll need loose pieces, tweezers, a piece of silicon/mylar tape, (all of which you can purchase here!) a hard flat surface, utility tape, a sketch of what you want to lay out. I like to work on a small cutting board so that I can turn it to work around the design. I also like to lay the loose pieces out on something that I can lift and move too. | |
| 2. You will need to separate the white backing from the sticky back silicon/mylar, probably the most difficult part of the process. Set the white backing aside for now. | |
| . 3. Handle the silicon/mylar carefully and place sticky side up onto your design. Tape the silicon/mylar into place. It is sticky and will stick to your hand while you are working, so the tape is necessary to keep it in place | |
| 4. You will be working with the pieces face side down, glue side up. Using the tweezers follow the outline of your sketched design. | |
| 5. Keep the spacing of the pieces even and not too close. The reason I like to use a movable work surface is important here, as I can use the side of the tweezers to fit in between the pieces. I rotate the board so that the tweezers always fit into the space between the piece I hold and the piece already in place. Another tip is to work from the center out. The flower center (yellow) is always placed first, and then I can space the petal pieces around it. | |
| 6. Place the white backing on the completed design for storage until you are ready to iron it in place on your project. | |
| 7. When you are making a word motif, you’ll always work with the design in mirror image. You are working face down. | |
| 8. When you pick up the completed design, it will be reading the right way |
Check out our new Iron on Hot Fix Gallery
by adminWe are now uploading hundreds of images to show you what you can easily do with the various sparkling designs located on our Hot Fix Iron on Designs page of our store.
Here is the Hot Fix Iron on Clothing Samples Gallery to show you great ideas for applying designs to clothing
